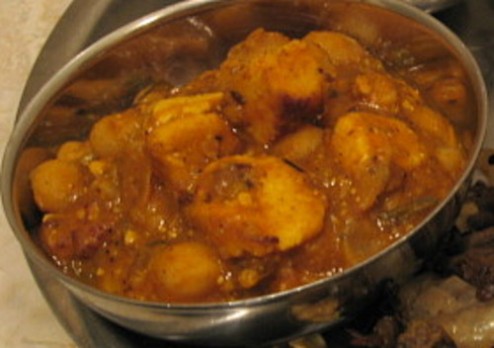
Chickpeas and Panir with Tomatoes and Garlic
The last few days I’ve been “laid up” with a back injury- nothing too serious- just a few strained muscles, and I am doing pretty well right now. But, during that time, I needed something fairly quick and easy to make as a main protein source, so I thought of making an old Jaffrey standby: chickpeas and potatoes in tomato and garlic sauce. It has no long onion-bhuno-ing step; instead, a massive amount of garlic paste is fried in oil, tomatoes are added and slowly simmered…(well, at least it’s an easier bhuno-ing that didn’t require me to stand for too long!), and then a fairly brief cooking of the sauce with the chickpeas. Instead of potatoes, I thought of using panir as I had pre-fried a home-made batch of it a day or two before my injury and tucked it away in the fridge. The rest I did in parts as I could tolerate it- but I must confess to you that I ended up reclining on the floor to peel the garlic!
Since I was a little bit in want of fun, I decided not to follow the rest of that original recipe exactly; instead, I took a cue from one of my favorite bloggers- the famous Musical and her equally famous Kitchen. Musical is always playing around with new ingredient combinations and trusting her instincts to concoct interesting mixes of spices- all the while managing to create some really delicious dishes. So I thought “why not?” and took her cooking-is-as-easy-as-breathing approach, and, amazingly, my experiment turned out! It tasted so good that I decided to share it with y’all… and especially this is for other garlic-tomato-chile combo lovers out there! (You know who you are!)
Chickpeas and Panir with Tomatoes and Garlic
2 C dried white chickpeas/ kabuli chana
3 T oil/ghee
1 t cumin seeds
pinch of hing
18-24 cloves of garlic, pasted- about 3 T
2 C tomato puree
2 t coriander seeds (dry-roasted)
1 t cumin seeds (dry-roasted)
1 t ground red chiles, or to taste
1/2 t turmeric
1 1/2 t amchoor (or lime juice to taste)
2-3 C panir cubes, lightly fried in oil and drained
2 t kasoori methi, finger-crushed
6 green chiles (I used serranos), sliced into 1/8″ rounds (de-seed if you prefer it milder)
3 C broth from the cooked beans
salt to taste
1)Rinse chickpeas well, then cover in plenty of water to soak 12 hours; drain, then add fresh water to cover by an inch or two and cook for 5 minutes at 15 lbs. in a pressure-cooker, allowing pressure to fall on its own and cool- or simmer in enough water to cover until tender. Drain, reserving 3 C of broth.
2)Dry-roast coriander seeds and 1 t of cumin seeds until medium-brown; cool, and grind to a powder.
3)Heat oil or ghee over med-low, add the remaining teaspoon of cumin seeds, fry for a few seconds, then add the hing, followed by the garlic paste; fry, stirring continuously until the raw smell disappears (keep your face away actually!)- about 2-3 minutes, until garlic is a pale brown and has lost most of its moisture.
4)Add the tomato puree, stir well and slowly fry, stirring occasionally at first and more frequently as it reduces, until the oil returns and appears at the edges.
5)Add the dry-roasted spices, turmeric, ground chiles, and amchoor; fry for about 2 minutes more.
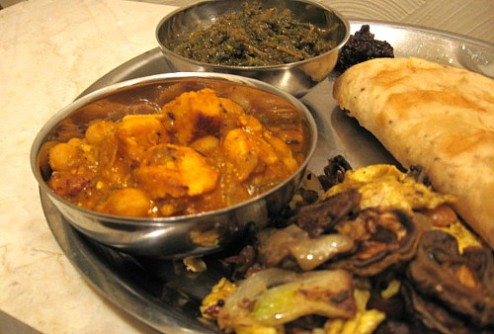
6)Add the cooked chickpeas, panir, kasoori methi, sliced chiles, and reserved broth; mix gently, bring slowly to a simmer and allow to cook uncovered for 30 minutes or so, stirring occasionally; add salt to taste. Serve with any flat-bread of choice- para(n)thas are always good. 😀 But I was feeling perky today so I made pooris; I was thrilled because they all puffed up like balloons and one of them was actually round! 🙂
(clockwise: chickpeas and panir…, bitter melon stir-fried…, a round poori, homemade karela ka achaar, Bihari-style saag/pureed green stuff)
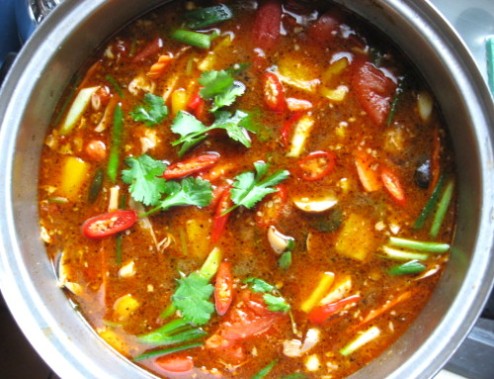
Kaeng Thom Yam
This is a post for one of my all-time, most-favorite “soups” in the whole world, most often referred to simply as “thom yam”… The name literally means a stew of boiled salad, but in American Thai restaurants it is most often labeled as “Thai lemongrass soup” or “Thai hot-and-sour soup”, both of which are apt descriptions as it does make use of a good amount of lemongrass, and it is indeed hot and sour.
While usually served in these restaurants as a first course, in Thailand it is often served in a special ring-shaped tureen fitted about a central, heated chimney. This keeps it piping hot throughout the meal, as, instead of being a separate course (traditionally in Thailand all dishes are served at once), it is sipped and nibbled upon throughout the meal, each diner taking ladlesful whenever one fancies, as a sort of recourse of lightness to play against “heavier”, coconut-milk-based stews. But of course it is also a great one-dish meal for lunches- or any other time something easy on digestion is desired. It is even served with rice noodles- instead of rice- to Bangkok’s lunching and late-night crowds. Add to this great adaptability the nearly endless variety of vegetables and/or meats that it can be cooked with, and it is then that one realizes part of the reason for its remarkable popularity at home and abroad.
Because of this nature, an exact recipe is somewhat difficult to communicate (though there are many written, of course). I find it easier to keep a “loose” recipe handy, mostly a guide for flavouring the broth, and add amounts of meat or fish and vegetables that I find convenient and have on hand. When choosing and arranging vegetables for cooking, keep in mind how long each takes to cook until heated through, but still retaining some crispness (not soft). Seafood of various kinds (especially shrimp- known as thom yam goong) is by far the most popular choice, but chicken and duck are also popular, and I have also heard of using pork or beef, balls of minced meats or seafood, and certainly there exist vegetarian versions.
In my latest rendition, I chose to use chicken (thom yam gai): I poached about 3 pounds, in water to cover, along with bruised coriander-roots, garlic, black peppercorns, and a little salt, for one hour; removed the meat from the bones and set it aside while I returned the scraps- snapping all bones in half- to boil for three more hours to achieve a good, rich stock. This was strained and allowed to cool, at which time I skimmed off and discarded most of the fat. I was left with about 2 quarts (8 cups) of stock, to which I added the following:
- 4 stalks of lemongrass (takrai)- dry, outer leaves removed; each stalk cut into 2″-3″ segments
- 1″ galanga (kha), unpeeled, thinly-sliced in rounds
- 20 sprigs/stems of cilantro (pak chee)- stems only, cut across into 1/2″ pieces; (set the whole leaves aside for the final garnishing)
- 12 lime leaves (bai magrut), twist each leaf to tear, leaving central stem intact
Allow this to simmer gently, covered, for 20-30 minutes; then add:
- 4 T fish water/sauce (nam pla)
- salt to taste
I had two bowls of vegetables arranged thus:
First bowl: 1 carrot, sliced; 2-3 C straw mushrooms, halved; 1 1/2 C green jackfruit, cut into bite-sized pieces.
Second bowl: 1 bunch of scallions/green onions, sliced into 2″ lengths on a diagonal; 3 roma tomatoes, diced into bite-sized chunks; 1 sweet yellow bell-pepper/capsicum, cut into 3/4″ squares.
Almost any vegetables of your choice can be used. I just have this “thing” about my thom yam containing mushrooms (of any kind!) and tomatoes…a preference if you will. My straw mushrooms and green jackfruit were both canned, so really the only vegetable I needed to be concerned with was the carrots, and these were so thinly-sliced that a brief, 4-5 minutes was all that was necessary. Raw, ripe fruits are also lovely used here- pineapple being exceptional!
So, bowl 1 was added, then a few minutes later bowl 2 was added, along with my cooked chicken which was also torn into bite-size pieces previously. I kept the heat on just until everything was heated through. Here in America, the bourgeois middle-class insist upon boneless, skinless chicken breast for everything, so, if you like, use this- thinly-sliced- instead of the stock-making meat. If you use shrimp (or other seafood), keep in mind that it takes only 1-2 minutes to cook, so add it at the appropriate interval during your vegetable “line-up”. Also, it seems to be common when cooking the seafood versions to use a mixture of chicken and seafood stock, but certainly this isn’t a rule, as I have seen recipes using pure shrimp stock.
At whatever point you add meat/seafood, this is the time to add:
- 2-4 T nam prik pao– to taste
This is the lovely, oily red paste which forms a red-tinged haze over the surface- one of the “chile-waters” in fact- that is a signature touch for this dish. When the vegetables and meat are done to your liking, season the stew with:
- 6 T lime juice
- some sugar, preferrably palm (I use about 1 t…but most Bangkokians prefer it much sweeter)
- and check for salt level
Then scatter over the top:
- the reserved cilantro leaves from above, and
- 10-40 thinly-sliced red chiles
Serve- with or without rice or noodles.
Note: the pieces of lemongrass and lime leaves are not meant to be eaten; instead, these are set aside as one encounters them.
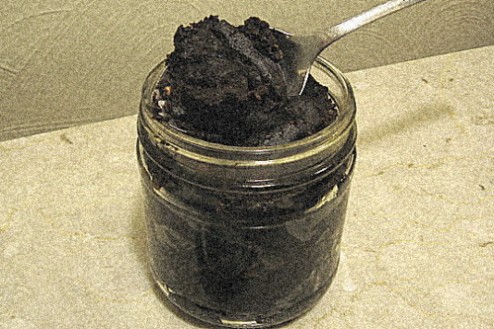
Nam Prik Pao
Or, dry-roasted chile-water. Except that, over several generations of cooks in Thailand, it became customary to deep-fry the ingredients before pounding them to a paste instead of dry-roasting them. Still, the old name remains…but, to tell you the truth, I have noticed a trend within the last few years of a nod backward to that old, oil-less method, which in turn is used to produce an equally oil-free version of one of my most favorite dishes, kaeng thom yam…
Luckily, I was well-spoilt on the oily classic before that lack-lustre, long-cloistered twin came out of hiding, and scoff and jeer at it side-by-side-and-arm-in-arm with stubborn Thais who also refuse to accept it as worthy of bearing the same surname. No, give me my perfect pools of red-kissed oil floating dreamily across the surface of my thom yam, fragrant and infusing the broth with oily-rich, brown flavours that cling to my tongue and lips like luscious liquid lava!
Though… this chile-water (excuse me, I need to wipe my mouth after that last paragraph) is used to season other dishes as well, and is also a condiment in its own right: like other chile-waters, it pairs amazingly-well on a platter with raw vegetables, grilled meats or fish, and balls of rice.
This particular recipe I have taken, with minor adjustments, from the book, Cracking the Coconut, by Su-Mei Yu- without a doubt one of the best volumes ever written on classic Thai cooking, and I do recommend it to anyone interested in a concise, detailed and extremely well-researched treatise on the subject. (And yes, to keep pace with the growing trend both here in the West and in her homeland, she provides vegan alternatives within many of the foundation recipes).
Nam Prik Pao
3/4 C vegetable oil (coconut oil is traditional, but other oils, such as peanut, are also fine)
1 C dried shrimp
1/2 C thin slices of garlic
1 C thin slices of shallots or onions
1 1/2 C torn, mostly-seeded pieces of clean, dry red chiles (I used a mixture of hot and medium-hot chiles)
1/3 C palm sugar, or other brown sugar
1/4 C thick tamarind extract
1/3 C nam pla (fish water/sauce)
2 T kapi (fermented shrimp paste)
0)Wrap the kapi in a small envelope of banana-leaf, parchment-paper, aluminum foil, or soaked corn-husk . Grill in a dry pan set over a medium flame, flipping now and then, for 6-10 minutes- until a pleasant charred flavour emanates. Remove packet and set aside to cool.
1)Rinse the dried shrimp just briefly in cool water; drain well.
2)Heat the oil in a wok over medium-low flame, add the shrimp and fry, stirring constantly, until browned and crispy; remove from the oil to drain, recapturing the oil if possible to add back into the pan.
3)Do the same separately with the garlic, shallots (these should be fried on high heat in the beginning, turning it down as they progress to brown), and chiles (just until a shade darker- 1 minute or so), in that order. Remove the pan from the heat for the moment.
4)Pound, using a mortar-and-pestle, or process, using an electric grinder, these fried ingredients to a paste, again starting with the dried shrimp and continuing in the same order, adding the next only when the previous has formed a smooth paste.*
5)Mix in the sugar, then the tamarind paste and fish sauce; unwrap the kapi, add and blend well.
6)Heat the wok- with the remaining oil (you should have about 1/4 C left; add more if necessary)- over medium heat; add the paste and fry, stirring constantly, until mixture begins to move in one mass and oil can be seen at the edges. Remove from heat and allow to cool, then place mixture in a clean, dry jar and cover tightly. Always use a clean, dry spoon to extract amount required.
*If using coconut oil as a cooking-medium in conjuction with an electric grinder, it is helpful to heat the tamarind-paste and fish sauce before adding to keep the machine running smoothly, lest the fat solidify.


