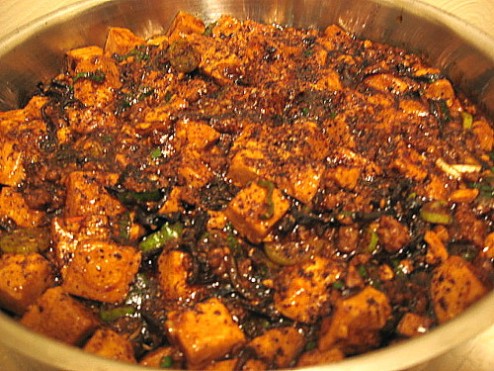
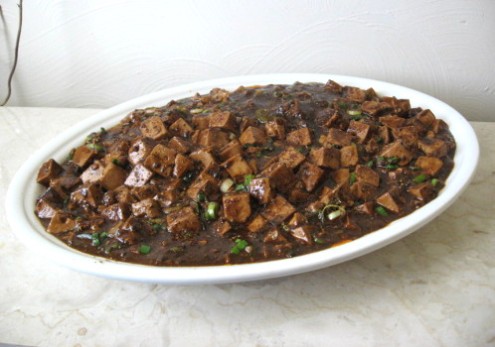
Ma Po Doufu: a Truly-Divine, Vegan Version
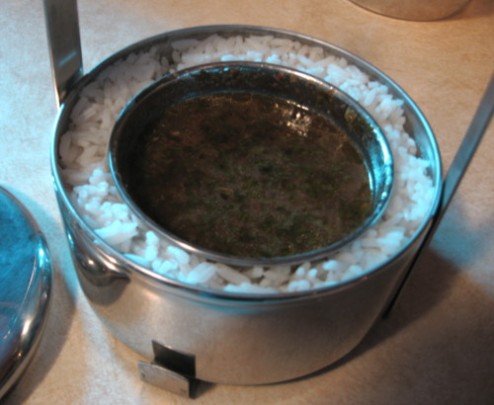
This is a lovely dish from the province of Szechuan, China, with an equally loverly story attached to its origin which may be read here. Only a handful of Chinese restaurants abroad ever offer this dish, for it isn’t a quick stir-fry: it is a simmered, stew-like dish with a bit of preliminary prep-work involved. Traditionally, a small quantity of ground pork (or beef) is included, and hitherto I have followed suit.
When I received an Arusuvai Friendship Chain gift of extremely-fresh, Szechuan peppercorns sent by the ever-talented Musical, I set to work almost immediately to prepare this long-time favorite which prominently features this tongue-numbing spice. I sat there, nibbling daintily away at a plateful with freshly-steamed rice, resisting an urge to shovel it in greedily (it is so delicious…) when a few thoughts struck me: truly, it is the finely-balanced sauce which dominates the flavour….the ground pork lends a gentle sweetness, but mostly the pieces serve as a textural counterpoint to the soft bean-curd…
And then, within a span of a few days, two jolting pieces of information crossed my path: first, I discovered the PETA videos posted on Youtube.com (I won’t go into detail here, but it would be sufficient to say that I saw things which I will not soon forget); second, the family chiropractor sent us his usual monthly newsletter. Most often this contains useful tidbits that he gleans from his personal wanderings in Ayurveda-land, but this time he included a brief summary of the findings of recent research that linked the consumption of animal protein to inflammation, and specifically a link to various forms of arthritis. And then…Jai of Jugalbandi wrote this post– furthur cementing my new convictions. So, I decided to make my consumption of animal protein an even rarer occasion than it already is. And I began to think of a new way to make ma po tofu…
Over the years, I’ve tried a few different recipes, but I really liked the one found in Irene Kuo’s The Key to Chinese Cooking. It’s so delicious. And I knew it would be delicious still without a half-pound of pork. But what to add in its place? TVP (textured vegetable protein) is an obvious choice; it closely replicates the chewy texture of meat, but… I don’t like to rely on a factory-made product too much, nor does it add a whole lot in flavour…
Mushrooms. I’ve sometimes added various types of mushrooms to this dish anyway… they’re somewhat chewy…they would add a subtle flavour… but how will I convert them into little pieces like that? The ways are endless… Walnuts. Coarsely-ground. Delicately-sweet, and they are also used frequently in China. Use both.
.
But first, who will I pass on the Arusuvai “torch” to? Hmmm…good question. Truly, no-one answered my riddle correctly. However… two people were quite close:
Linda of Out of the Garden answered “tofu” correctly (but seasoned differently)…and
Zlamushka of her own Spicy Kitchen answered “Ma…” correctly (but named another Szechuanese dish).
Since these two were the closest, I invited them to be my recipients of a little suprise…and they have both accepted the offer. Congratulations to both of you!
.
And now, Mushroom Meal!!!:
I took 1/2 pound (8 oz.) of plain old “button” mushrooms (they’re popular for a reason) and shredded them into a moist heap. But, not wanting shreddy-strands in my dish, I dehydrated this (I used an electric food-dehydrator, but an oven on a low-heat setting will work as well). Then, I took these dried shreds and smashed them into a coarse, granular powder in a mortar…the restrained use of an electric mixer/grinder or food processor will do the job just as nicely. We all end up with about 2-3 tablespoons. I suppose the same could be done to already-dried (stems removed) shiitake/Chinese black mushrooms- though I think their flavour would be too dominant here- but perhaps another milder-flavoured ‘shroom?…
Ma Po Doufu/Tofu
(Pel’s vegan version based on Mrs. Kuo’s)
3 blocks of firm tofu (original recipe calls for 4- 3″X3″ blocks…generally, American blocks are a bit larger)
hot water
2 T peanut (or other) oil
4 slices of peeled, fresh ginger; minced
1/2 C coarsely-ground raw walnuts
2-3 T mushroom meal (dried, coarsely-ground mushrooms– see above)
Seasonings:
1 T Chinese cooking-wine, or dry sherry
1 T hot bean paste (AKA Szechuan bean paste)
1 T dark/sweet soy sauce
1 t or more, to taste, red chile oil* (optional)
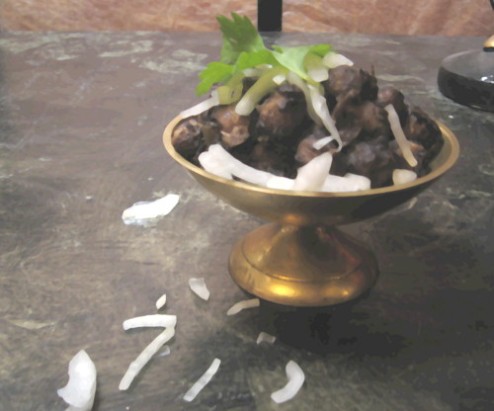
1 C lightly-salted chana broth (liquid from cooking chickpeas/garbanzo beans) or other vegetable-stock
Binding sauce:
2 t cornstarch dissolved in 1 T cold water
1 T dark/sweet soy sauce
2 t roasted sesame-seed oil
Finishing:
2 whole spring onions (I used more cuz I like ’em: 6), thinly sliced
1/2 t (or more if you like) lightly dry-roasted and crushed Szechuan peppercorns
1)Cut the bean-curd into 1/2″ cubes; cover with hot water and drain just before adding.
2)Heat the peanut oil in a wok over med-low flame; add the ginger and fry until fragrant; add the walnuts and fry just until they begin to smell roasted.
3)Add 1 C of hot water and the mushroom meal; bring to a simmer and cook, stirring occasionally at first and then more frequently, until the mixture is fairly dry and the mushrooms have reconstituted- about 20 minutes.
4)Add the seasonings and stir well; add the chana or vegetable broth.
5)Drain the bean-curd and scatter these into the pan; stir very gently to even these out; bring to a gentle boil, cover the pan and cook for 5 minutes over med-low heat, stirring once during this time.
6)Stir the binding sauce well, then pour in a spiral over the contents of the pan; stir gently until the sauce thickens; turn off heat.
7)Gently fold in the spring onions;
8)Turn onto a serving-platter and sprinkle the ground peppercorns over the top; serve with hot steamed rice. You will assuredly enjoy! (Did I mention this is delicious?)
*Red chile oil can be bought, or simply made this way: heat 1 C oil until quite hot; remove from heat and add 6 T (3/8 C) ground red chiles (stand back, the fumes will irritate your breathing apparatus), stir gently for about a minute, then add 1 C more of oil to halt the frying. Allow to cool completely, strain through a musin cloth or several layers of cheesecloth and pour into a bottle. Besides being a useful cooking-sauce, it can also be used as an ingredient in dipping-sauces and salad-dressings… hotness yum!
Chickpeas and Panir with Tomatoes and Garlic
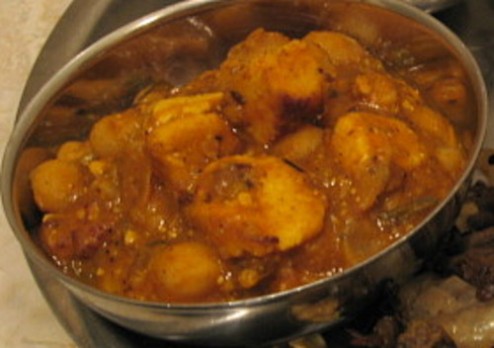
The last few days I’ve been “laid up” with a back injury- nothing too serious- just a few strained muscles, and I am doing pretty well right now. But, during that time, I needed something fairly quick and easy to make as a main protein source, so I thought of making an old Jaffrey standby: chickpeas and potatoes in tomato and garlic sauce. It has no long onion-bhuno-ing step; instead, a massive amount of garlic paste is fried in oil, tomatoes are added and slowly simmered…(well, at least it’s an easier bhuno-ing that didn’t require me to stand for too long!), and then a fairly brief cooking of the sauce with the chickpeas. Instead of potatoes, I thought of using panir as I had pre-fried a home-made batch of it a day or two before my injury and tucked it away in the fridge. The rest I did in parts as I could tolerate it- but I must confess to you that I ended up reclining on the floor to peel the garlic!
Since I was a little bit in want of fun, I decided not to follow the rest of that original recipe exactly; instead, I took a cue from one of my favorite bloggers- the famous Musical and her equally famous Kitchen. Musical is always playing around with new ingredient combinations and trusting her instincts to concoct interesting mixes of spices- all the while managing to create some really delicious dishes. So I thought “why not?” and took her cooking-is-as-easy-as-breathing approach, and, amazingly, my experiment turned out! It tasted so good that I decided to share it with y’all… and especially this is for other garlic-tomato-chile combo lovers out there! (You know who you are!)
Chickpeas and Panir with Tomatoes and Garlic
2 C dried white chickpeas/ kabuli chana
3 T oil/ghee
1 t cumin seeds
pinch of hing
18-24 cloves of garlic, pasted- about 3 T
2 C tomato puree
2 t coriander seeds (dry-roasted)
1 t cumin seeds (dry-roasted)
1 t ground red chiles, or to taste
1/2 t turmeric
1 1/2 t amchoor (or lime juice to taste)
2-3 C panir cubes, lightly fried in oil and drained
2 t kasoori methi, finger-crushed
6 green chiles (I used serranos), sliced into 1/8″ rounds (de-seed if you prefer it milder)
3 C broth from the cooked beans
salt to taste
1)Rinse chickpeas well, then cover in plenty of water to soak 12 hours; drain, then add fresh water to cover by an inch or two and cook for 5 minutes at 15 lbs. in a pressure-cooker, allowing pressure to fall on its own and cool- or simmer in enough water to cover until tender. Drain, reserving 3 C of broth.
2)Dry-roast coriander seeds and 1 t of cumin seeds until medium-brown; cool, and grind to a powder.
3)Heat oil or ghee over med-low, add the remaining teaspoon of cumin seeds, fry for a few seconds, then add the hing, followed by the garlic paste; fry, stirring continuously until the raw smell disappears (keep your face away actually!)- about 2-3 minutes, until garlic is a pale brown and has lost most of its moisture.
4)Add the tomato puree, stir well and slowly fry, stirring occasionally at first and more frequently as it reduces, until the oil returns and appears at the edges.
5)Add the dry-roasted spices, turmeric, ground chiles, and amchoor; fry for about 2 minutes more.
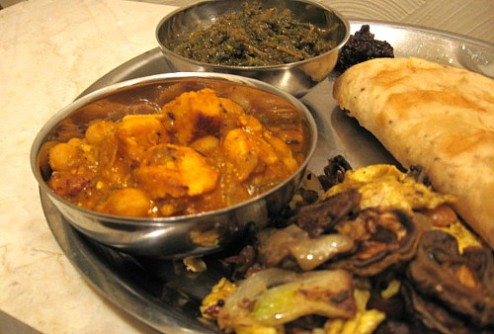
6)Add the cooked chickpeas, panir, kasoori methi, sliced chiles, and reserved broth; mix gently, bring slowly to a simmer and allow to cook uncovered for 30 minutes or so, stirring occasionally; add salt to taste. Serve with any flat-bread of choice- para(n)thas are always good. 😀 But I was feeling perky today so I made pooris; I was thrilled because they all puffed up like balloons and one of them was actually round! 🙂
(clockwise: chickpeas and panir…, bitter melon stir-fried…, a round poori, homemade karela ka achaar, Bihari-style saag/pureed green stuff)
Puneri Aamti
I think this dish is usually called kataachi aamti, and I would assume that this version hails from the city of Pune in the state of Maharashtra. This heavenly, thin dhal- at once extremely aromatic, sweet-sour, and spicy-hot- is sipped from small bowls or cups, and appears to be very closely tied to the enjoyment of a sweetly-stuffed roti known as puran poLi, which is more-often made with chana dhal or moong dhal. When preparing the sweet dhal stuffing for puranpoLi, the thin liquid from cooking the dhal is reserved for making this aamti, as well as a little of the sweet, coconut-infused stuffing for added body. This version is, instead, made of toor dhal, and enjoyed on its own, though recipes for puranpoLi also made of toor dhal do indeed exist!
I am sending this over to Linda of Out of the Garden, for her parade of toor dhal dishes for this months’s JFI. Or, is it a tour of toor?
Puneri Aamti
1 C toor dhal
1/2 t turmeric
1 t ground red chiles
2 t goda masala
1/3 C tamarind extract
1/3 C gur
2 T finely-grated coconut
salt to taste
2-3 t oil (recipe originally calls for 4 T)
1/4 t whole cumin
1/4 t mustard seeds
a pinch of hing
10 karipatta
1/2 C chopped coriander leaves
1)Rinse toor dhal well (soak for an hour or more if desired- decreases cooking time), add turmeric and boil in enough water until quite soft; add ground chiles, goda masala, tamarind extract, gur, coconut, and salt to taste; simmer for 10 minutes or so, adding water as needed to make a thin preparation.
2)Heat oil, add cumin seeds, mustard seeds, hing and curry leaves; when the mustard seeds start popping, pour over hot dhal; simmer a bit longer, then add coriander leaves, remove from heat and cover for a few minutes; stir well and serve in small bowls for sipping, with puranpoLi, or ladled over plain rice.
Pindi Chole/Chana (Ek)
Yes, I know I ought to be blogging about pecan pie, mashed potatoes, Lithuanian mushrooms and beets, Hungarian lima beans, or…uh…..mole poblano…but, after all the leftover turkey (which was subsequently made into soup and turkey salad sandwiches) and, in short, the slew of western food which has totally thrown my system out of whack, I’m back to cooking food that I crave and enjoy on a daily basis…for a bit at least, so bear with me if you’re hanging on for one of those aforementioned recipes!
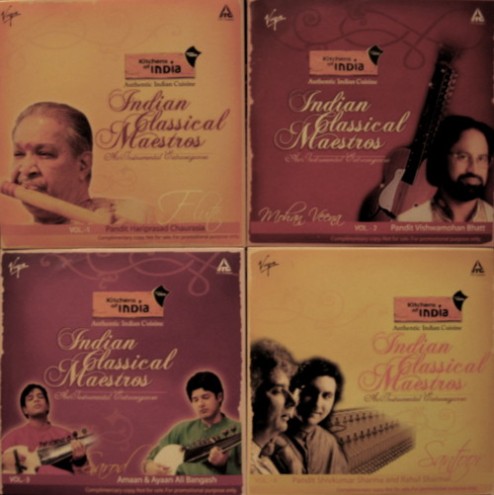
I had never heard of Pindi chana until a few months ago, when a locally-owned-and-extremely-large grocery store had a sale on packs of Kitchens of India convenience food for $1.50 each. No biggie really, except each one also contained a free CD of Indian classical music- a possibility of four different ones! Wowee!!! Well, I thought it would be fun to try and get all four, and in the process I tried every dish in their line. I wasn’t terribly impressed with any of them (kind of bland), but one of them wasn’t too bad after I “doctor’d it up” with some garam masala and extra ground chiles…anyway, I eventually managed to find all four CDs (you can sleep easy now my readers), and then I made a point of doing some research on this dish called Pindi chana…
Or Rawalpindi chana…Rawalpindi is a city in the Punjabi province of present-day Pakistan, with an extremely long history of several invasions and changes in power. The city contains many fine examples of architecture- ancient Buddshist, Hindu, and impressive Moghul shrines, two lively bazaars to wander about, as well as countless restaurants, food-stalls, and street-vendors from which to sample the local fare.
And I imagine that the variation in chana recipes is endless…which is what I discovered when I went Pindi-chana-recipe-hunting. Some said that kala (black) chana should be used, others said kabuli (white)…some said that it should be made with amla (Indian gooseberries) for souring and to achieve a dark colour, some said tea bags are the thing. Some used tomatoes, some stated that tomatoes shouldn’t be used at all. And then, there is a dispute over onions: only raw to accompany the final dish, and then no…browned as part of the masala, as well as raw for a final sparkle. Oh, it just goes on and on….the only thing I know for certain is that I won’t know anything until I visit this city, which I would really like to do someday. And when I get there, I’ll be sure to try every offering of chana I see and report to you here what I find out. But, I couldn’t possibly believe that just ONE recipe is being prepared all across a city of 3 million….can you?
I decided to try a recipe which Ashwini of Food for Thought stumbled upon in a most unlikely place: the booklet that accompanied her new pressure-cooker! I chose to try it first because it was the most different from all the others that I had read. After the first whirl, I found that it also tastes absolutely different from any other chana/chole recipes I have ever tried, and I like it very much, so much so that I’ve made it four times now! That’s blog-worthy I think.
Over the course of these recipe-runs, I found myself making a few changes in method- nothing that compromises the original intention of the recipe, no- namely a way to do both a brief oil-extraction of the masala while avoiding the overcooking of the chickpeas, and waiting until the end of the cooking to add the garam masala to avoid evaporating off all of the precious (and volatile) oils of elaichi…
Pindi (Rawalpindi) Chole (Chana)
2 C dried Kabuli chana (white chickpeas)
2 heaping teaspoons of black tea, coarsely powdered*
2 badi/moti/kala elaichi
5 cloves, ground**
3 small sticks of cinnamon (I use about 3-4 inches of cinnamon- like a finger-length)
3 T ghee and/or peanut oil (the original recipe uses 8 T…use any amount you prefer)
4 green chiles
1/2″ of fresh ginger
1 T whole cumin
1 1/2 T whole anardana
1 1/2 T coriander seeds, ground
1 T amchoor
1 1/2 t black pepper, ground
salt to taste
1-2 t garam masala
coriander leaves
sliced onions
1)Soak the chickpeas for 24 hours; drain, rinse once and drain again; place these, along with the tea, kala elaichi, cloves, cinnamon, and water to cover 1-2″ in a pressure-cooker; cook for 12 minutes at 15 PSI; remove from heat and allow to cool and pressure to fall (or cook in a large saucepan until tender). Drain, reserving liquid. Remove and discard kala elaichi and cinnamon.
2)Meanwhile: halve the chiles, de-seed, then quarter lengthwise; cut across into 1/8″ strips. Peel the ginger, then slice into thin rounds; stack the rounds and cut into fine shreds. Dry-roast, separately, the cumin and anardana seeds; grind and combine with the other dried spices, reserving the garam masala alone in another bowl.
3)Heat the oil to smoking, then add green chiles and ginger; stir once and add the ground spices; stir once again and add the reserved liquid from chana; keep at a slow boil, stirring frequently as it reduces and lowering heat as you go, until thick enough to coat the stirring-spoon.
4)Add the drained chickpeas and salt to taste; stir carefully over gentle heat until fully-hot. Remove from heat and stir in the garam masala.
5)Serve topped with sliced raw onions and coriander leaves. What is this served with? I don’t know…I usually eat it with rice. And I must say that the flavour is even better the day after it is made!
*The original recipe calls for 1 tea bag. I thought it should be darker still, plus I mostly buy loose tea so that I can pretend to read fortunes in a cup. The extra fiber doesn’t hurt either, and I do recall reading about a tea-leaf salad somewhere…
**The original recipe calls for 5 whole cloves to be cooked with the chana and then fished out afterwards. I got tired of trying to find them and decided to grind them up.
P.S. You may be wondering (or not) if I’ll be trying other Pindi chana recipes in the future and blogging about them? You bet! But the story will always go from free CDs to Ashwini’s complimentary booklet from a pressure-cooker, and then onwards…
Hyacinth Beans
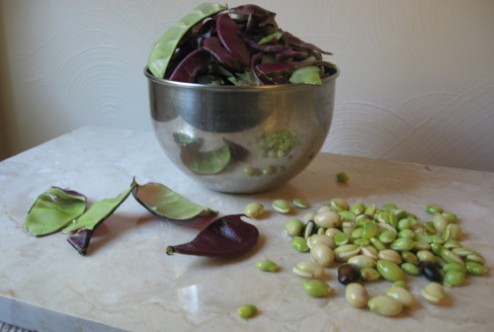
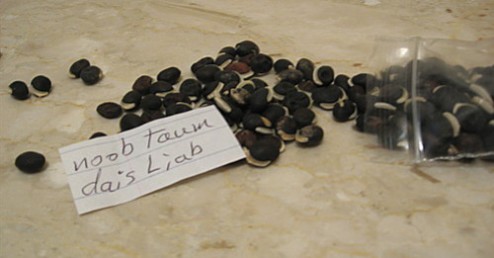
While on a canned green jackfruit hunt this past spring, I found myself patiently waiting in line to check out at a Thai-Lao grocery and happened to glance on the checkout-counter at a basket containing small plastic bags of various seeds for planting. Most I recognized: bitter melon, bottle gourd, basil…but one package in particular attracted my interest. I thought, “My gosh, these look just like val with that tell-tale stripe on the seam, but…but, they’re black!” Fascinated, I added a packet to my pile to purchase.
When it was my turn at the check-out, I inquired what these beans were called and what they were used for. The owner of the shop didn’t know what they were called in English, but stated that, in her culture, they were usually used while green, and that they had very beautiful flowers that were often used for tucking into hair-do’s and for fresh decorations for use around the home and for festivals.
Indeed, a little research on the internet when I returned home confirmed my suspicion. I immediately had inflated fantasies of growing these beans to their dark-hued maturity and proudly displaying them here and featured in traditional dishes in place of their pale sisters. But no…after they were planted, wily vines began to grow and grow. The vines bore beautiful purple-tinged leaves. And it wasn’t until a few weeks ago that the flowers came: a mass of pale violet that collected much admiration from my mother and the neighbors. May I pick a few? I sighed and consented of course. At this time of year very few blooms are to be seen: marigolds mostly. Dark, dark violet pods did indeed develop though, and though I kept checking, the beans inside were still young and green with not enough time to mature and be used to fulfill my blackened fantasy. Because, my dear readers, the first frost that is the deadline for tender harvest here in the bay of green will be tonight. (October 27th) Finito.
So… something valuable can be learned, and perhaps it is this: if you live in a place where the winter is long and you wish to grow a tropical legume, do start the seeds early indoors if you’d like an impressive fall harvest of endless pods and, with hope, some mature beans. However, if all you’d like to enjoy are the beautiful leaves and flowers, and maybe a few green/unripe pods, then do as I did and plant them casually…
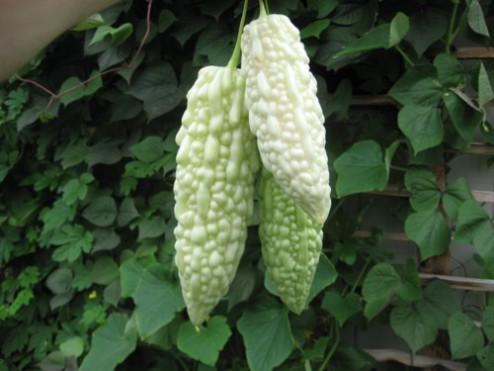
At left on the ground are dragon’s tongue beans; white bitter melon vines twine over the left trellis and part of the right, mixing with a stray cucumber vine and hyacinth beans (which eventually take over). Globe thistle tries to stay out of the party in the center, but is harrassed by both the bitter melons and hyacinth beans.
Although the first name that I learned for these beans was the Marathi term val, I later learned that these were known variously in English as hyacinth beans, Bangalore beans, Indian beans, Egyptian beans or lab-lab beans, and avarekaalu in Kannada. More information can be read here and here, and seeds for planting (both purple and white) may be ordered here.
Shilpa of Aayi’s Recipes has a beautiful entry in her glossary with more information and names in other languages which may be found here, as well as a rather tasty-looking dosa recipe and a fortifying chitranna– both of which use these beans.
Asha of Foodie’s Hope has posted a lovely recipe here.
I also found a marvelous-looking saaru recipe and informative post here from Suma of Veggie Platter, and Srivalli of Cooking 4 All Seasons even has a fan club devoted to this time-honoured dish from a family friend!
Back from China…
Well, no…actually I was just browsing through one of my cookbooks and came across this recipe for steamed buns with a sweet red-bean filling(ma yung bao, for those interested). I recall making them a few years back for one of my ex’s, but perhaps you know how things like food become associated with past moments and people, and how you can find yourself “forgetting” certain dishes for awhile…well, I see no need to deprive myself of these any longer. Time goes on. Time heals all wounds, and, as my granny used to say, “Time wounds all heels…”
Unfortunately, granny wasn’t Chinese, so Confucious, you need not worry dear- your position is safe! But grandma-ma did take a Chinese cooking class several years ago, though I don’t think she was able to use her new-found skills much, as grandpa was a sworn “meat-n-potatoes”-kind-of-guy, but… I think she would have loved these! Truly. Perfect with tea, or an anytime-little-treat. Travels well too.!
Ma Yung Bao
(Chinese steamed buns filled with sweet red-bean paste)
For the red bean paste:
1 C adzuki/red chori (more info here)
3 lumps of gur/jaggery, crushed- or any sugar of your preference to taste
a pinch of salt
1) Take the adzuki/chori, rinse them in a few changes of water, then cover well with water and soak for 4 hours or so (this step can probably be skipped). Place beans and water to cover an inch or so in a pressure cooker and cook (at 15 lbs of pressure) for 10 minutes. Allow to cool and the pressure to fall.
2)Then, remove the cover and bring to a gentle boil and evaporate as much water away as possible, stirring gently now and then. When it begins to catch, remove from heat.
3)Puree the beans in food processor until a smooth paste is achieved, or, if you like, you may take small portions and bang away in a mortar-and-pestle or sill-batta to achieve a paste.
4)Return the paste to a pan, set it over low heat and add the sugar and salt. Stir frequently until the sugar is dissolved. Remove from heat and allow to cool completely*. This can be stored for a very, very long time in the refrigerator without spoiling.
5)Alternatively, sweet red bean paste may be purchased in a can, but I’ve tried it and trust me, this is way better and not too difficult.
For the buns**:
1 t active dry yeast
1 T sugar (some recipes use more- up to 1/4 C)
1/4 C lukewarm water
3 1/2 C all-purpose flour/maida
1 T solid fat (I used ghee, but Chinese recipes traditionally use lard)
3/4 C lukewarm water
1)Dissolve the yeast and sugar in 1/4 C of water. Set aside.
2)Rub the fat into the flour until crumbly and well-mixed, then add yeast mixture and remaining 3/4 C of water to form a slightly sticky dough. Adjust with flour/water as necessary.
3)Turn out onto a floured work-surface and knead for 5 minutes. Dust more flour if it is too sticky. At the end it should be smooth and springy. Set in a large bowl, cover with a damp cloth, and place in a warm place to rise for about 2 hours- until it has doubled in size.
4)Punch the dough down and re-cover it for about 30 minutes to rise and double in size again. At the end of this return the dough to the work-surface and knead 5 minutes again.
5)Take the dough and roll it into a long “log” about 2″ wide. Cut this in half, and then cut each half into portions that, when rolled into a ball, will be about 2″ in diameter. I didn’t do this… I just pinched off balls of dough; you get a feel for the appropriate size.
6)Take each ball of dough and flatten them between your palms and then roll out to about a 4-5″ circle, dusting top and the rolling surface with a pinch of flour.
7)Place a heaping tea-spoon of filling in the centre.
8)Then, make pleats along the outer edge as shown, pinching each to seal; gather the set of pleats and pinch while turning and slowly releasing the dough as you go. It takes some practice; I didn’t really get it right until the last few were produced, but no matter how they look, they’ll taste fine in the end!
9)Set these on grease-proof/waxed paper, laying the damp cloth gently over, to rise for 30 minutes or so.***
10)Line a steamer tray (or heat-proof plate within a steaming apparatus) with a damp cloth and place the buns within, leaving ample room around each to allow for furthur expansion during steaming. Steam for 15 minutes.****
11)Remove the steaming container from the steam underneath (carefully to avoid steam-burns) and allow the buns to cool and the remaining steam to escape before lifting the lid. (A sudden temperature change will cause the buns’ surface to crack). Then remove and serve. These can be made ahead and re-heated in the steamer for a few minutes if you wish, though I find they are still delightful at room temperature.
Here are pics of the rolling and filling:
*Some recipes for this paste require heating a small amount of roasted sesame-seed oil (3 T) in a pan before adding the paste, and also adding preserved cassia blossoms (2 t) as a flavouring, but I am unable to locate this in my city.
**This seems to be the preferred dough for this, but when I made these previously, I used a “quick” method that incorporated baking soda or powder instead of yeast. Some writers even suggest ready-made, refrigerated ”Parker house roll” dough (such as Pillsbury brand) as a quick substitute, but you know me…
***Some recipes invert them- pleats down- after this point.
****Some recipes brush the buns with roasted sesame-seed oil.
Oh! And before I forget…I discovered a very good way to use spent coffee-grounds and the juice from salted cucumbers! It’s my own little invention. [assumes a smug expression]
Take a large spoonful of moist coffee-grounds, add some juice that was squeezed from salted cukes, and a little yoghurt…voila!
A chemical-free, energizing facial-scrub! Just be careful not to get any in your eyes, as it doesn’t feel very good. (I know this from experience, perhaps.)

